Wednesday, May 4, 2011

Universal 3 Colors Pop-up Flash Diffuser Cover for Camera

From: Dealextreme

URL: http://www.dealextreme.com/p/universal-3-colors-pop-up-flash-diffuser-cover-for-camera-56811?r=75907141

Price: USD5.00

What is it?

IMG_5690

The package comes in 4 items – the diffuser holder and 3 colors (white, orange and blue). To setup, connect one of the color diffuser to the holder and place it in your camera flash hotshoe. That’s it. Is that simple.

IMG_3350

How is the quality

I used it on my Canon 60D and was very happy with the result (more on the photos outcome later). The holder and diffuser is very solid.

White

Orange

Blue

IMG_5698 IMG_5699 IMG_5700

I will update with more photos when I have my tripod.

Final Thought

Is cheap and work as advertised. Highly recommend to get it.

Shopping at DealExtreme

Recently I found a very good, reliable and great online shopping site called DealExtreme. The site offers lots of stuff and provide payment via Paypal and free shipping (at least to Singapore). You can also opt for the tracking delivery.

Wednesday, February 16, 2011

Lxpodisc Version 1.0

Construction

The Expodisc is used in place of a white card to set manual white balance. It looks like a fat filter with a fluorescent light fixture diffuser on top and white plastic on the bottom. It costs about USD120.

You don't photograph through it. You put it over your lens and put your camera in the same position as your subject. Point the camera back to your shooting position. Set the camera's white balance while it measures the same light that will fall on the subject.

Once set, put away the Expodisc and shoot from your original position. You don't shoot through the Expodisc, except to set the WB.

clip_image001

My Lxpodisc

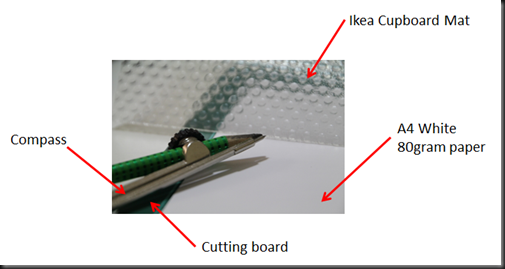
With the concept above and plan to DIY my own ExpoDisc. Here are the materials needed for LxpoDisc:

a. White paper (80gram – 1 piece A4 size)

b. Ikea cupboard mat (SGD 5.00)

c. Cutter and cutting board

d. Compass, ruler, etc

e. Self-laminating sheet (SGD2.00 from Daisyo)

f. White glue
clip_image002

DIY steps

1. Draw the circle as per your filter size (in my case it was 72mm, so I create a 75mm circle)

2. Draw an outer circle of 85mm as the frame for the disc

3. Cut the cupboard mat to the size of the filter

4. Laminate the paper and cut the outer circle, glue the cupboard mat onto the inner circle

5. Bend the laminated paper to make a cap

The finished product should looks something like this:

clip_image004 clip_image006

clip_image007

How it works?

Canon camera setting only.

1. Put it in front of the lens

2. Take a picture and you should get a more constant greyish/whitish photo (look like need version 2.0)

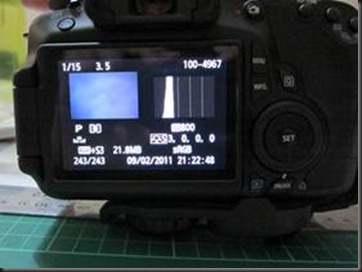
clip_image009

And the reading as:

clip_image011

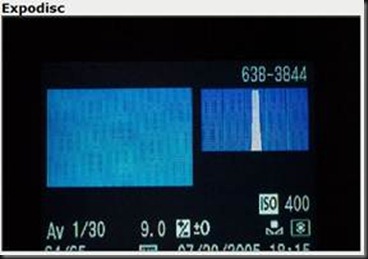
and compare with ExpoDisc:

clip_image013

Conclusion: mine is one step too dark, so need to add 2 stop to brighter the photo.

3. Go to Custom White Balance and choose the photo, click OK

4. Go to White Balance and select Custom (clip_image014)

Photo comparison with Auto White Balance

AWB

clip_image014[1]

clip_image016

clip_image018

clip_image020

clip_image022

Notice the AWB a little yellowish due to the lighting aand Lpxodisc a little darker due to my setting.

Conclusion: Will be working on version 2.0 and use lighter white paper.

Technorati Tags: ,,,

Tuesday, December 21, 2010

REGISTER

Wednesday, December 15, 2010

Alienware MX11

IMG_4014

Not sure how to start. This notebook is the replacement of my old gaming notebook Asus G2. To me is a downgrade as my G2 is a 17” gaming notebook Sad smile but for my son is an upgrade as now he is mobile gamer Open-mouthed smile

Size comparison between G2 and MX11

IMG_4021

Why buy Alienware?
1. Asus G2 Bios/motherboard is dead and not sure how much to replace it.
2. Need an additional notebook for my son
3. New notebook must be more mobile then my current notebooks (OK… some call it desktop replacement)

So after searching for sometimes, I concluded that the replacement notebook will be Alienware MX11 or MX15. I checked the Dell’s website for the latest promotions/offers and decided to get it for Christmas but Santa does know how to makes my dream comes true.

We when to Courts at Tempenis to get “other” electrical stuff and we found Alienware on display. This is where Santa came in. The hourly promotion for the set (just as we about to step out) was SGD 970 (original price was SGD 1890) and no one interested in it as everyone saying that the set to heavy for netbook, must be demo set, blah, blah, blah. So I grab it and found it is a new set.

Unboxing MX11
The box was heavy for a netbook (MX11 is 11” notebook but in the size of 13”). The packaging was nicely design, when you open it you greeted by some alien’s language:

IMG_4015

And this is not the set, just a box for cables, CD and other reading documents. The actual set was much deeper under:

IMG_4017

IMG_4019

Note: The mouse and hard disk not part of the package.

The set we bought was black and set the colors to red.

IMG_4023

IMG_4025

Specifications
CPU: i5 (guess is 1.73ghz)
RAM: 4GB
GPU: NVidia with 1GB and Intel GPU (switchable without restarting)
Hard disk: 500GB

IMG_4022

Size wise, guess just nice for my son and hopefully will last him a couple of years Open-mouthed smile

IMG_4024

Friday, December 3, 2010

Me and my thinkTANK

IMG_3936

I have decided that my Lowepro CompuTrekker Plus AW is just too bulky to carry around for day-to-day usage, plus I do not have that many lens left after the trade-in of my old camera.

I start searching for a new camera bag and my requirements for the new bag:

a. must able to fit in my Dell Vostro 13 (13” notebook but with a length of 14”)
b. able to accommodate my iPad and other accessories
c. future expansion such as able to add bottle/lens holder

So after searching thru various shops and online, I found thinkTank. I have to admit that the built quality of the bag is almost identical to Tumi or Victorinox, strong, rugged and can withstand my daily usage (abuse).

The model I bought was thinkTANK Urban Disguise 35 V2.0

IMG_3946

The specification:

Weight (empty): 1400 grams
Dimension: 10” L x 13.25” H x 6” D

IMG_3934

In short is heavier and smaller than my Targus (the backpack on the left). This bag is like Swiss army knife for bag, lots of compartments:

a. The back/notebook compartment can fit my notebook and ipadIMG_3938

b. Camera compartment can fit my Canon 60D with Tamron 18-270mm lens, plus both side that can fit my Joby SLR and Canon EF-S 10-22mm USM.

IMG_3939

c. The front notebook compartment can fits a 10” notebook or iPadIMG_3942

d. Others can store pens, keys, etcIMG_3943

Plus comes with raincoat for the bag Open-mouthed smileIMG_3944

And overall is a good bag.

Monday, November 29, 2010

Good bye…..

After months of consideration between Canon 7D and 60D, I finally decided to go for the Canon 60D (more review on that later).

Before I go out and get the new body, I need to know what am I going to do with my old Canon body, already in my collections are 2 full-frame body (one Canon and the other Minolta – belongs to my wife) and old lens.

I bought the Canon 300D when it was first launched, in US it was call the Canon Rebel and was one of the first digital SLR. This body already about 8 years old. I used it for all my “rugged” travel (to extreme cold winters to normal tropical environment).

After long consideration, I decided to trade in the body plus some of my old lens for Canon 60D plus an all-in-one lens (more on the lens later).

I traded:

IMG_2554

For

IMG_2559

IMG_2555